 Armies are the backbone
of your military conquest.
With them, you attack your
enemy and put yourself one
step closer to victory!
To play Realms At War, you need to understand a few basic concepts. Once you learn these, the rest of the game is fairly simple to play. These concepts form the core of the game...and none is more important than the concept of combat. In this game, combat is determined by the rolling of dice! While some armies will have an easier time fighting than others, no army is guaranteed victory.
When an army attacks one of your armies, you look at the enemy army's Valor (see Stats, below). Then, roll an eight-sided die. If you roll higher than that army's Valor, you win, and the attack fails! If you don't, the attacker wins. That's all there is to combat.
Another important concept is that of the War Pool. Each player has a War Pool, which is filled with War Tokens. These tokens represent the resources you have available to play during your conquest. After army setup (see Setup, below), each player places three War Tokens in their Pool. At the start of each turn, each player adds a War Token to their Pool.
When you play a card, you must pay its cost, which is found in the card's upper-left corner (see Stats, below). This is done by moving tokens equal to that card's cost out of your War Pool and into the War Pool of the player to your left. As you play more cards, your opponent gains more War.
TopRealms at War includes three different types of cards, each of which serves a purpose in the game. These cards are: Armies, Assets, and Tactics. Using these three cards, you will attempt to conquer the battlefield, victorious after the dust settles.
Armies are the backbone
of your military conquest.
With them, you attack your
enemy and put yourself one
step closer to victory!
 Assets can be important
to some strategies. They
have several effects that
can help you in war. Assets
represent several things,
including defenses, heros,
and even generals.
 Tactics are cards that
either temporarily or
permanently change the
course of the game. They
are constantly being triggered
during combat, as you alter
your plans to achieve victory.
The cards in Realms At War contain several different numbers and symbols on them. Each of these items is important to the game, and will help you create your winning army. Look at the pictures below to see all of the different statistics.
Well, that's an excellent question. But it's one that's easy to answer. The stats that you see above are the most crucial stats needed to play Realms at War: Cost, Type, Valor, Speed, and Phase. What is each one? Read below...
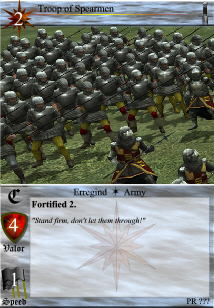
Cost is the most important part of the game, in some ways. You must meet a card's cost to play it, which means that you must move War Tokens from your War Pool. The example army Troop of Spearman has Cost 2, which means that to play it, you must remove two tokens from your War Pool and place them in your opponent's War Pool. If you don't have enough tokens in your War Pool to play the cost of a card, you can't play it.
Valor is probably the next most-important stat. With Valor, you determine the result of a combat. Whenever one of your armies attacks an opponent's army, your opponent must roll an eight-sided die. If they roll higher than the attacking army's Valor, then your army's attack fails. Otherwise, your army wins the attack! Valor also determines how determined an army is to fight. An army with low Valor is weak, and likely to rout from the field as soon as it can!
Speed is also critical, simply because it is the one restriction on your legions. Each time an army takes an action, it must deplete some of its Speed. When it has no Speed left, it is exhausted, and cannot take any more actions.
Type isn't as important, but it is a critical part of the game. This part of the card tells you what type of card it is. The image of a sword-hilt means that this card is an army. The image of a supply-stuffed sack means that this card is an asset. The image of a parchment with arrows means that this card is a tactic.
Phase is a stat specific to tactics, and it relates to how tactics are played. Basically, the higher the phase, the later the card can be used. For example, a simple defensive line might have a phase of 1, but a final charge might have a phase of 5.
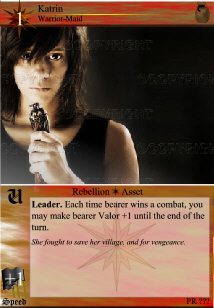
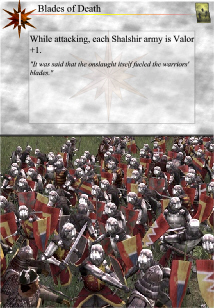
Besides these stats, there are a few other ones, not quite as important: faction, rarity, and number. The faction of a card factors in mostly for deckbuilding. It is located beneath the card image. Also, each different faction has a unique color scheme for its cards. Compare the three examples, which are each from a different faction. Rarity and number are there merely as collector's information. The rarity is located on the left side of the card, above Valor, and the number is in the lower-right corner.
In addition to stats, cards have a title, a subtitle (sometimes), gametext, and lore. A title is what the card is referred to as. A subtitle is merely there to distinguish between multiple versions of the same card. For example: Sammard, Fiery Leader and Sammard, Leader of the Mob. Gametext contains special abilities and traits of the card, and lore is only there to add to the flavor of the game.
TopTokens...they play a big role in Realms at War. Tokens are placed on cards or in certain areas of the playing field, and they are used to mark several different numbers in the game. The different types of tokens are: defeats, strains, Fear, and war tokens. Each of these affects the game in a different way.
Defeats are the most vital of all the tokens, or at least I think so. These tokens are used to mark how an army has fared during combat, and how strained it is as a result of its combats. The more defeats an army has on it, the worse it will fight in combat, and the closer it is to breaking and routing from the field. Each time an army is attacked, and it loses, place a defeat on it. An army is Valor -1 for each defeat that it bears. And when it gets to 0 Valor, it routs. But more on that later.
Strains come next on the list, because they interact with Speed, so they affect how many actions an army can take. Each time an army is required to "expend", place a strain on it. An army must expend if a card requires it, if it wishes to attack, or if it wishes to maneuver on the battlefield. For each strain an army bears, it is Speed -1. An army with Speed 0 is "exhausted", which means that it cannot take any more actions.
Fear...it can lose or win the game for you. As armies begin to rout from the field, your army grows more fearful, and not as willing to fight for you. And when you lose enough armies, your entire army will be broken, and flee from the field. Each time one of your armies routs, look at its cost. Place that much Fear onto your rout pile (more on that later). When your Fear is equal to your Warrior's command (more on that later, too...) you lose the game.
War tokens are the major resource of the game. When you play cards, you pay their cost through war tokens. All your war tokens go into your war pool, and are moved from your war pool to your opponent's war pool when you play cards. Cards can add to or subtract from your war token total.
TopThe battlefield of Realms At War is quite obviously the most important part of the game. There are a few different parts of it, as you can see in the picture below. Pay attention to the fact that it's made for two players, so each player gets an identical half.

The battlefield is divided up into three areas: the Tactics area, the Assets area, and the Battleground. The Tactics Area is where Tactics are played. The Assets Area is where assets are played. The Battleground is where the combat of the game takes place. War is waged, and warriors rise and fall. It's also more complicated than the other two, so let's take a closer look...

The first thing you might notice is that there are two main parts to the battleground: the Frontline and Reserves rows. The Frontline rows are the rows directly involved in combat. The Reserves rows are the rows not involved in combat (usually). For example, #1 and #3 are both in the Frontlines, and #2 is in the Reserves. This means that #1 and #3 are considered "Frontline", while #2 is considered "Reserves".
There are also three wings of the battlefield: Left, Center, and Right. The Left and Right wings are considered "flanks". So, #1 and #3 are also flank armies, while #2 is a center army. Notice that one army's Left flank is not next to the other army's Left flank. Flanks are always referred to from the perspective of the player who controls them.
When we want to refer to a specific portion of the battleground, we combine its row and wing. So, #1 is in the right frontline, #2 is in the center reserves, and #3 is in the right frontline. This makes six "squares" on the battlefield for each side, twelve "squares" total. An important thing to note is that each "square" can only contain two armies at the most.
Now that we've covered that, let's move on to the concept of adjacency. Two armies are said to be adjacent if the "squares" that each army occupies are touching along a border. So, if the player on the bottom had an army in his left frontline, that army would be adjacent to #1. Armies cannot be adjacent by corners. #2 and #3 are not adjacent.
TopAll right, now it's time to take everything that we know about Realms At War and go through a sample turn. We'll follow the start of a game between Ted and Sue, two players of Realms At War.
By the roll of a die, Sue is picked to play first. She takes a special Asset, called a Warrior, from her deck, along with an army bearing the keyword "sworn". You are only allowed to have one Warrior in your deck, although there is no restriction on how many sworn armies you can have in there. The Warrior she selects is Sammard, Fiery Leader, and the army is Village Warriors. She plays Village Warriors, and adds its cost (two War) to her opponent's War Pool (different rules apply to setup: if you don't have enough War to play a card, simply add the differenc to your opponent's War Pool). Then, she plays Sammard on the Warriors. Now, this army has 6 Valor (5 to start with, and a bonus of 1) and 3 Speed. It also has a couple chunks of nice gametext. Sue plays the Warriors and their Warrior to one of the battleground "squares" she controls.
Ted plays Artyr, Commander of Many on Bodyguard of the Warrior. This army is Valor 7 and Speed 2, and since it costed 2, Ted moves both War Tokens into Sue's War Pool. His army also has a nice chunk of gametext.
Now, look at both Warriors. Artyr has a Warrior keyword that states "Command 12". Sammard's Warrior keyword says "Command 9". When the total cost of all your armies on the field is equal to your Warrior's command, you may end your setup. Then, your opponent may play an army; then, they end their setup. Ted and Sue continue to play armies: Sue ends up playing Peasant Poachers, two Peasant Farmers, two Fanatic Warriors, and two Furious Villagers. Together, all of her armies cost 9, exactly. Ted plays two Troop of Longbowmen, two Troop of Spearmen, and a Troop of Swordsmen. Together, all of his armies cost 12. He and Sue are finished setting up, and each player draws seven cards. Then play moves to the first Recruit phase.
The Recruit phase is when you play cards to the table. At the start of each Recruit phase, each player adds three War Tokens to their War Pool. Then, the players take turns playing armies and assets. Assets are always played to your Assets area, and Armies are always played to your Reserves.
Because Sue went first in the setup, she goes first in the first Recruit Phase. She decides to play Enraged, so she pays the cost (2). Ted now has 5 War, and Sue has 1 War. Ted plays Entrenched, for a cost of 1. Now, he has 4 War and Sue has 2 War. Sue plays Undaunted, and Ted plays another copy of Entrenched. The War count is now 4-2 again.
Sue passes her turn, and Ted passes as well. This ends the Recruit phase. Play now passes onto the Combat Phase(s).
At the start of each combat phase, all players place the top card of their Tactics Deck facedown in their Tactics Area, looking at it first. Sue places Late Arrivals in her Tactics Area, and Ted places Fortified Lines in his. Neither one can see the other's tactic, because it's facedown.
Then, each player counts the number of cards in their hand, and the number of tactics in their Tactics Arena. Then, each player chooses one of the numbers. That number is their War Number: how many actions that they may take in that Combat Phase. When the number of actions taken equals your War Number, you may not take any more actions in the current Combat Phase. Ted and Sue both have seven cards, and they both choose seven as their War Number. This means that each player may take seven actions.
Before all other actions, actions that say "Archery:" or "Bombard:" must be resolved. Bombard actions are resolved before archery actions. These also count against your War Number, like other Combat Phase actions. Neither Ted nor Sue take any actions during these phases.
Sue decides to get in an attack right away. She wants to attack with Furious Villagers. The only adjacent armies are a Troop of Swordsmen and a Troop of Spearmen, both in the same "square" of the battlefield. She decides to attack the Swordsmen, because the Spearmen are fortified (more on that later). So, she expends the Furious Villagers (they're Speed 2, now with one strain) and declares an attack on the Troop of Swordsmen. The Furious Villagers are Valor 5, so Ted has to beat that number with a die roll. He rolls, and it's a 4-not enough! The Swordsmen lose, and so Ted defeats them once. Now, the Swordsmen have Valor 4 because of that defeat.
Ted decides not to move one of his armies as an action, and instead initiates his tactic Fortified Lines. To do this, he looks at the Phase of the tactic, and then looks at how many tactics are in the Tactics Area. He's already got one (Fortified Lines), so he meets the cost to activate the tactic. Notice: a tactic can be spotted to meet its own phase requirement. To initiate the tactic, Ted flips it right-site up. Now, that tactic's game text can be used. In this case, it benefits fortified armies, like Ted's Troop of Spearmen.
Sue decides to attack again, and she expends Furious Villagers again for another attack on Troop of Swordsmen. Ted rolls again, and this time rolls a 6. He successfully defends his army! Sue's army is not defeated for losing the combat.
Ted is ready to go, and he decides to strike right back at Furious Villagers. He expends Troop of Swordsmen, and attacks Furious Villagers. Sue tries to beat Swordsmen's Valor of 4, but is incredibly unlucky-a roll of 1! As a result, Furious Villagers loses the combat and is defeated. But look at the card's text: "Each time this army loses a combat, defeat it." This means that there's another defeat placed on that army! Now, it's at Valor 3!
When an army's Valor is reduced to 0, that army immediately routs. Place it in your rout pile, and place X Fear on your rout pile, where X was the army's cost.
Now, notice that each player has taken two actions. The Combat phase continues until both players cannot take actions because of their War Number. Then, each player must make a decision. They can either begin a new Combat phase, or move on to a Recovery phase.
Another type of action you may take during the combat phase is called "Maneuvering". This simply means that you move an army from one "square" of the Battleground to an adjacent "square" controlled by you. To maneuver an army, you must first expend it.
There's not much to the Recovery phase. Basically, you take as many Recovery actions as you want (if more than one player is in the Recovery phase, take those actions in turn). Then, when you're finished with Recovery actions, refresh armies in any combination, removing up to six strains. You can refresh six armies, one army, even combinations of armies, as long as the total number of refreshes is six or less. Then, draw two cards. This ends your Recovery phase.
Once all players in turn complete a Recovery phase, the turn ends. All War is cleared from the pool, and play returns to the Recruit phase.
TopThere is one way to win the game: be the last surviving player. When your Fear and your Warrior's Command are the same, you are eliminated from the game, because your army has routed. Remove all of your cards from the game. The last person left wins!
TopRealms at War contains many Keywords with rules attached to them. In Prophecy, there are three keywords: swift, fortified X, and immovable.
In Realms at War, there are just a few simple rules that restrict your deckbuilding.
And that's it! Happy deckbuilding!
Top